Fabulous Gluten Free Italian Bread
Ingredients
- 3 cups3 cups3 cups Kim's Gluten Free Bread Flour Blend (click for recipe), plus 3 tbsp (453 g)
- 2 Tbsp2 Tbsp2 Tbsp Granulated White Sugar, plus 1 tsp (29g)
- 2 tsp2 tsp2 tsp Kosher Salt
- 2 tsp2 tsp2 tsp Quick Rise Yeast

- 1 Tbsp1 Tbsp1 Tbsp whole Psyllium Husk, (or 1.5 tsp psyllium husk powder)
- 2.25 cups2.25 cups2.25 cups Milk, (540 ml) (a dairy free can be substituted, but hasn't been tested)
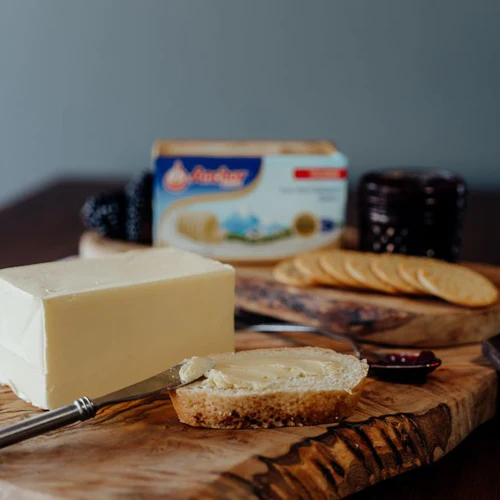
- 4 Tbsp4 Tbsp4 Tbsp Unsalted Butter, melted (56g) (dairy free butter can be substituted, but hasn't been tested)

Process
- In the bowl of a stand mixer, weigh bread flour, sugar, salt, and yeast. Whisk to combine. Place on the mixer and turn the mixer on low and slowly pour in the milk and butter. Increase the speed to medium high and knead for about 5 minutes.
- Scrape the dough into a large mass (or into another bowl) and cover the bowl with plastic wrap. Allow to rise for about 2 hours or until doubled in size in a warm, draft-free location. Refrigerate for at least 6 hours, but up to 7 days.
- On baking day, remove the dough from the refrigerator and dump it out onto a liberally floured surface. Knead until smooth. Roll it into a torpedo or batard shape (not as long as a baguette, but wider). You can divide the dough into two smaller loaves, if desired. Place the shaped dough on a piece of parchment and onto a pizza peel, but you can also use an overturned baking sheet. Cover with plastic wrap and allow to rise for about a half an hour. It will not double in size, just be slightly puffed.
- While the bread is rising, place a baking steel (or baking stone, or an overturned baking sheet) on the middle rack of the oven and a shallow baking pan (such as a broiler pan) on the rack below it. Preheat the oven to 450˚F.
- Slide the bread, parchment and all, onto the steel, stone, or baking sheet. Add one cup of hot tap water to the broiler pan and quickly shut the oven door. Alternatively, you may drop a couple ice cubes on the bottom of your oven to create steam.
- Bake for about 30-35 minutes, or until you begin to smell the bread and it feels relatively light for its size (pick it up with gloved hands--if it feels at all heavy, add another 5-10 minutes to the baking time and check again). If the top is getting too dark, cover the bread with aluminum foil.
- Remove from the oven and allow it to cool on a wire rack before cutting. The crust will soften as it cools.
Notes
*The original recipe for this bread was made without psyllium husks, but I’ve found that psyllium husks allow for the dough to be handled better and actually kneaded versus pouring it out onto a sheet of parchment. If you would like to make the original version (without the psyllium husks) drop the milk back down to 2 cups (480 ml). Store this bread, well wrapped, for a few days on the counter. After that, it will begin to go stale (as any good bakery style bread does). It can be refreshed by running the loaf under cold water and placing it in a 350 degree oven (right on the rack) for about 15-20 minutes. The bread can be frozen, well wrapped, for about two months. ***DISCLAIMER: The reason I created my own flour blends is because I could not obtain the results I wanted with flour blends that were available in stores, online, or from other gluten free bloggers. My recipes have been developed to be used with my own bread flour blend that I created after painstakingly testing for, in some cases, YEARS to develop what I believe to be a superior gluten free bread like no other. If you do not use my gluten free bread flour blend for this recipe, I cannot speak for the results you will obtain. While store bought blends may give you a satisfactory result, they will NOT give you the results intended in my recipe.
Add a Note
My Notes:
About This Recipe
Baked Goods Coconut Free Egg Free Gluten Free Nut Free Pescetarian Shellfish Free Side DishesFellow foodies also viewed
Never Miss a Bite
Get recipes delivered to your inbox every week




Leave a Reply
You must be logged in to post a comment.