Bread + Butter Pickles
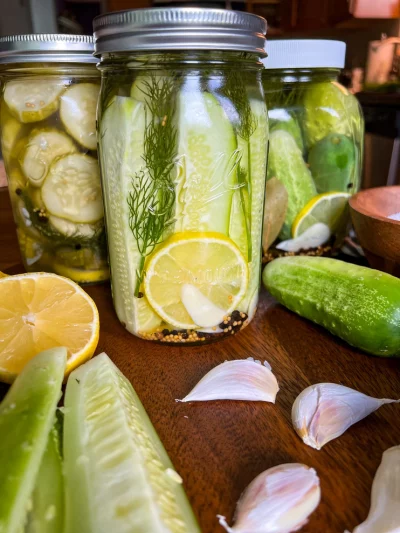
I'm really big into lacto-fermenting, which uses no vinegar at all. However, for bread + butter pickles I'll choose the best of both worlds. Is this lacto-fermenting? Not technically. It's inhibiting the growth of certain probiotics that you'll see in a typical salt brine lacto-ferment without vinegar, but we are still leaving this deliciousness out on the counter for a few days to culture it's own good vibes.
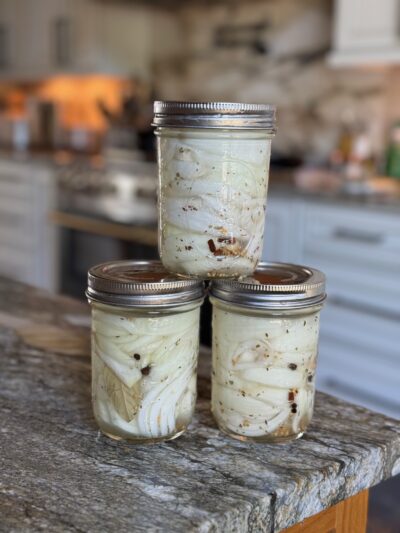
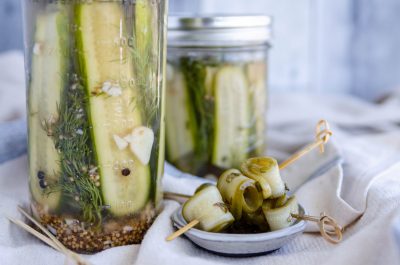
Photo above shows the before and after of 5 days on the counter.
Ingredients
Into the Brine
- 1 Tbsp1 Tbsp1 Tbsp Sea Salt

- 340 grams340 grams340 grams Honey, 1 cup

- 240 grams240 grams240 grams Apple Cider Vinegar, 1 cup
- 1 whole1 whole1 whole Lemon, juiced

Into EACH Jar
- 0.75 tsp0.75 tsp0.75 tsp Pickling Spice, I shared a photo of the one that I use
- 0.125 tsp0.125 tsp0.125 tsp Turmeric

- 1 whole1 whole1 whole Bay Leaf

- 0.25 whole0.25 whole0.25 whole Onion, sliced
- 3 whole3 whole3 whole Mini Cucumber, sliced, I usually fit 3-4 small pickling cukes per pint jar
Buy Ingredients on the FoodSocial Market
Shop over 3500 products from unique and independent, creator-curated brandsProcess
Note, these instructions are written assuming the standard serving size, since you have modified the number of servings, these steps may need to be modified for best results
- Mix your brine and set aside.
- Add boiling water to your pint jars and allow to sit for 10 minutes to sanitize. I usually do 3-4 pints to utilize the brine I've made, meaning you'll need 9-12 small pickling cucumbers to use it all. Dump the water out.
- Add pickling spice, turmeric and bay leaf to EACH jar (each pint jar will need 3/4 tsp pickling spice, 1/8 tsp turmeric, etc.).
- Layer cucumbers and onions into jar applying pressure as you go so you can fit as much as possible while leaving about 1" of head space.
- After each pint is filled, just barely cover the contents with brine. I then place a fermentation weight on top and use the lid to apply a bit of pressure to the weight to smash everything into the brine. If you don't have a weight, fill the jar almost to the top with the brine (you'll likely need to make a bit more).
- You will leave these in a cool dark place on the counter for 5-7 days. Each day, unscrew your lid a bit to release any build up of gas. If you did not use a fermentation weight and your lid won't leak, I'd flip the jar each day to be sure everything stays moist in the brine and cannot grow mold. The goal is to keep everything under the brine. See notes for other options.
- Place in fridge, they'll be good for 6+ months!
Notes
You can use a boiled stone as a weight, a cabbage leaf or something similar. You want to keep the contents of the ferment beneath the brine. This is key with any ferment. You can also use an airlock top if you don't want to burp your jar each day. Here is a link to my jar weights and my airlock tops.
Add a Note
My Notes:
About This Recipe
Show nutritional information
Coconut Free Dairy Free Egg Free Gluten Free Grain Free Nut Free Paleo Pescetarian Shellfish Free Snacks Specific Carbohydrate Diet Sugar Alcohol Free Vegetarian| This is our estimate based on online research. | |
| Calories: | 354 |
| Fat: | 0 g |
| Carbohydrates: | 100 g |
| Protein: | 0 g |
| Cholesterol: | 0 g |
| Sodium: | 1732 mg |
| Fiber: | 1 g |
| Sugars: | 93 g |
| Sugar Alcohol: | 0 g |
| Calculated per serving. | |















Leave a Reply
You must be logged in to post a comment.