The Softest Gluten-Free Cheesy Dinner Rolls
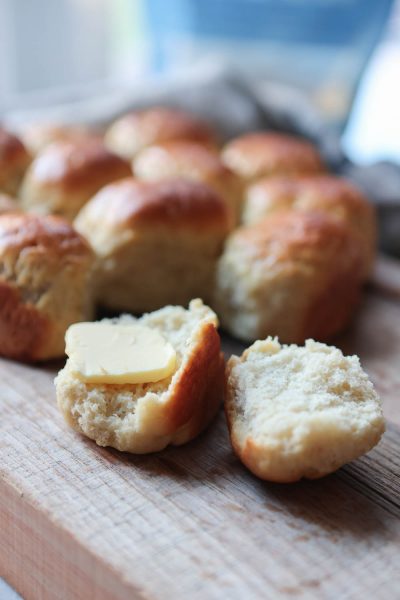
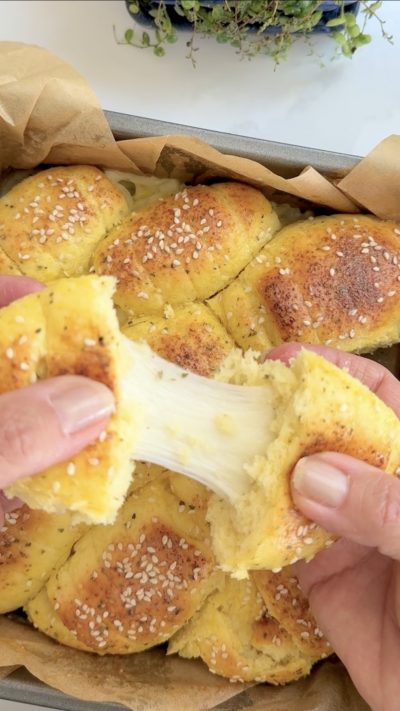
These cheese stuffed, and seasoned dinner rolls are incredibly delicious. They are also extremely soft and squishy, so much so that you won't believe they are gluten-free! They are full of flavor from the seasonings on top. Add them to your favorite meal, you will love them!
Ingredients
- 360 grams360 grams360 grams Gluten-Free All-Purpose Flour - Primal Palate, 3 cups, spooned and leveled

- 2 Tbsp2 Tbsp2 Tbsp Milk Powder, Non-Fat
- 50 grams50 grams50 grams Granulated White Sugar, 1/4 cup

- 1 tsp1 tsp1 tsp Himalayan Pink Salt

- 2 whole2 whole2 whole Eggs, large eggs, at room temperature
- 1/4 cup1/4 cup1/4 cup Butter, Unsalted, melted and cooled

- 1 cup1 cup1 cup Whole Milk, warmed to 110 degrees
- 2 1/4 tsp2 1/4 tsp2 1/4 tsp Active Dry Yeast
- 1 tsp1 tsp1 tsp Granulated White Sugar

- 2 tsp2 tsp2 tsp Psyllium Husk, Ground
- 3/4 cup3/4 cup3/4 cup Mozzarella Cheese, low moisture, shredded
- 3/4 cup3/4 cup3/4 cup Mild Cheddar Cheese, grated
- 1 whole1 whole1 whole Egg, one large egg
- 1 Tbsp1 Tbsp1 Tbsp Water
- 2 tsp2 tsp2 tsp Little Palates Herb Garden Seasoning - Primal Palate

- 3 Tbsp3 Tbsp3 Tbsp Butter, Unsalted, melted

- 1 tsp1 tsp1 tsp Kosher Flake Salt - Primal Palate

Egg Wash and Seasoning
Buy Ingredients on the FoodSocial Market
Shop over 3500 products from unique and independent, creator-curated brandsProcess
Note, these instructions are written assuming the standard serving size, since you have modified the number of servings, these steps may need to be modified for best results
- In the bowl of your stand mixer, combine the flour, milk powder, sugar, and salt. Using the paddle attachment, mix the dry ingredients on medium speed to combine evenly.
- Measure the milk in a glass measuring cup, and microwave for 45 seconds, or warm on the stove in a pot until it reaches 110 degrees.
- Whisk in the yeast and sugar, and allow to proof for 5 minutes. You should have a cap of foam on the top of the milk by the end of the 5 minutes.
- Add the melted butter, and eggs to the stand mixer, and beat on medium speed until you have a crumbly dough.
- Whisk the psyllium husk powder into the milk and yeast mixture, and then pour the milk mixture into the stand mixer, being sure to scrape all of the liquid from the measuring cup.
- Beat the dough on medium-high speed until it looks whipped and fluffy. Scrape down the bowl as needed to be sure there isn't any dry flour stuck to the bottom of the bowl.
- Transfer the dough to a proofing bucket with a lid and cover with the lid, or simply scrape the dough into a mound in the center of the bowl of the stand mixer, and cover the stand mixer with plastic wrap.
- Allow the dough to proof at room temperature for 1 hour.
- Preheat your oven to bake at 375 degrees, grease a 9x9x2 square baking pan, or something similar.
- Place the shredded mozzarella and cheddar in a bowl, and combine the two cheeses evenly together.
- Prepare a bowl of gluten free flour to use for dusting your work surface, and set aside a bench scraper and rolling pin.
- Dust your work surface with flour, and turn the dough out onto the surface. Sprinkle to top of the dough with more flour, and gently knead the dough just slightly to degas it, and then form it into a mound.
- Flatten the dough with your hand, and then roll the dough out into a rectangle shape large enough to divide the dough into 9 equal portions. You can weigh the whole dough ball and divide that number by 9 to get an exact weight for equal size rolls, but eyeballing it is fine.
- Flour your surface as needed if your dough starts sticking to the bench. Working with one portion of dough at a time, press the dough out with your hands into a circular shape, about 1/4 inch thick. Just thick enough that you can fill it with cheese and fold the dough over the cheese, but not thin enough that it will tear.
- Place 1 tablespoon of the mozzarella and cheddar mixture in the center of the dough, and fold the sides up over the cheese, and press gently to seal it together.
- Turn the roll over so that it is seam side down, and rotate it swiftly in a circle between your hands to smooth the roll and shape it into a circle, and seal the bottom more.
- Place the roll into your prepared baking pan, and repeat this process with each portion of dough.
- Place the rolls in the pan in three rows of three. Brush each roll with the egg wash, and then sprinkle the Herb Garden seasoning on top of each roll.
- Place the rolls in the oven to bake at 375 F, for 30 minutes.
- Remove from the oven, allow to cool for 3 minutes, then brush with melted butter and sprinkle with kosher flake salt
Add a Note
My Notes:
About This Recipe
Show nutritional information
Baked Goods Coconut Free Gluten Free Nut Free Pescetarian Shellfish Free Sugar Alcohol Free| This is our estimate based on online research. | |
| Calories: | 344 |
| Fat: | 20 g |
| Carbohydrates: | 25 g |
| Protein: | 16 g |
| Cholesterol: | 58 g |
| Sodium: | 583 mg |
| Fiber: | 0 g |
| Sugars: | 7 g |
| Sugar Alcohol: | 0 g |
| Calculated per serving. | |















Leave a Reply
You must be logged in to post a comment.