Gluten-Free Artisan Bread (dairy and egg-free)
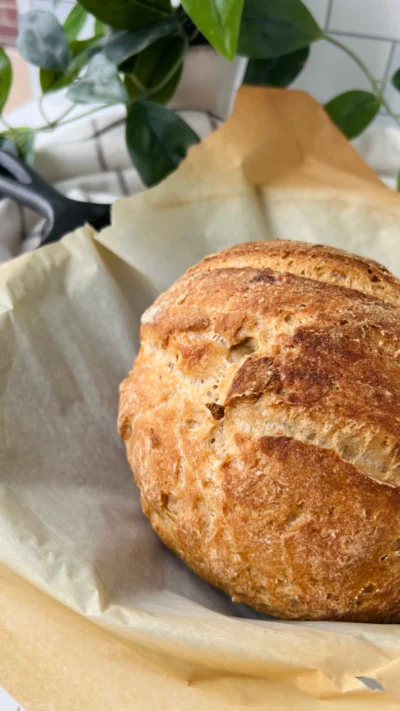
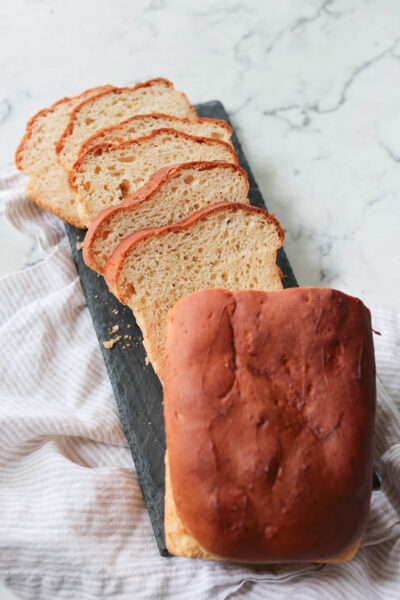
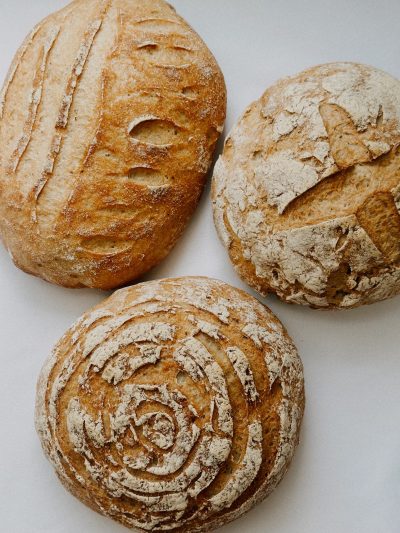
The perfect gluten-free and dairy-free artisan loaf! If you cannot eat gluten, dairy, or eggs, and have been missing perfect crusty bread, this is the recipe for you to try. It takes some time, but the end result is so worth it. You won't believe this bread is gluten-free!
Ingredients
- 400 gram400 gram400 gram Water, approximately 400 ml, warmed to 110 degrees F.
- 1 Tbsp1 Tbsp1 Tbsp Granulated White Sugar

- 1 Tbsp1 Tbsp1 Tbsp Active Dry Yeast
- 450 gram450 gram450 gram Gluten-Free All-Purpose Flour - Primal Palate, 3 3/4 cup spooned and leveled

- 2 tsp2 tsp2 tsp Baking Powder

- 1 tsp1 tsp1 tsp Himalayan Pink Salt

- 1 Tbsp1 Tbsp1 Tbsp Apple Cider Vinegar
- 2 Tbsp2 Tbsp2 Tbsp Extra Virgin Olive Oil

- 1.5 tsp1.5 tsp1.5 tsp Psyllium Husk, Ground
Buy Ingredients on the FoodSocial Market
Shop over 3500 products from unique and independent, creator-curated brandsProcess
Note, these instructions are written assuming the standard serving size, since you have modified the number of servings, these steps may need to be modified for best results
- In a glass measuring cup, weigh your water which has been warmed to 110 degrees.
- Whisk in the sugar and yeast until the yeast has dissolved. Allow the yeast to proof for 5 minutes.
- While the yeast is proofing, combine the flour, baking powder, and salt in the bowl of your stand mixer.
- Using the paddle attachment, mix the dry ingredients on medium speed.
- Add in the apple cider vinegar and olive oil, and mix again on medium speed for about 30 seconds.
- Whisk the psyllium husk powder into the yeast mixture to dissolve the psyllium evenly in the liquid, and then pour the yeast mixture into your dry ingredients. Be sure to scrape all of the liquid from the glass measuring cup into your mixing bowl.
- Beat the dough on medium-high speed, for about 5 minutes, scraping down the bowl once to make sure flour isn't stuck to the bottom of the bowl.
- After 5 minutes your dough will be light and fluffy looking. At this point you can transfer it into a proofing bucket, or cover to proof at room temperature for 1 hour.
- If your kitchen is hot, you may only need to let the dough rise for 30 minutes.
- After it has doubled in size, place it in the fridge for 6-12 hours. I like to do this overnight.
- After 6-12 hours, you are ready to shape your dough. Dust a banneton (or proofing basket) with flour, and dust your work surface with flour.
- Turn the dough out onto your work surface , and dust the top with flour. Now you will just be gently degassing the dough while you shape it into a mound. I like to do this by pressing down lightly on the dough with my hands, and then using a flexible bowl scraper to help me shape the dough into a mound.
- Using your bowl scraper, scrape under the dough to lift it off of your work surface, and then place it into your banneton. Cover the banneton, and place back in the fridge until you are ready to bake. I like to let it sit for at least an hour in the banneton so it takes on the beautiful spiral shape. You can let it sit in there for another day if you'd like.
- Place a cast iron pot that can fit the boule into your oven, and set the temperature to bake at 550 degrees F.
- Allow the pot to heat at 550 degrees F for one hour. After the pot has been heating for 30 minutes, remove your dough from the fridge so that it can come to room temperature before baking.
- Once the pot has been heated for 1 hour, and your dough has been at room temperature for 30 minutes, turn the boule out on a sheet of parchment paper, and score the top with a lame or a serrated knife.
- Open the oven, remove the lid from the pot, and transfer the boule into the pot by holding the parchment paper on the sides. The boule will bake on the parchment paper in the pot.
- Cover the pot, close the oven, and immediately turn the temperature down to 450 degrees F.
- Bake the bread for 85 minutes, remove from the oven, and take the lid off of the pot.
- Allow the bread to cool completely out of the pot before slicing. I let mine cool for at least 3 hours.
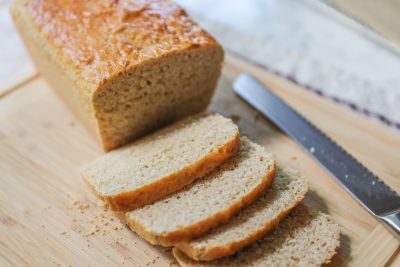
- Slice, and enjoy on its own, or toasted. Store at room temperature wrapped in parchment paper within 2 days, then slice and freeze what is left.
Add a Note
My Notes:
About This Recipe
Show nutritional information
Baked Goods Coconut Free Dairy Free Egg Free FODMAP Free Gluten Free Nut Free Pescetarian Plant Based Shellfish Free Sugar Alcohol Free Vegan Vegetarian| This is our estimate based on online research. | |
| Calories: | 154 |
| Fat: | 4 g |
| Carbohydrates: | 25 g |
| Protein: | 1 g |
| Cholesterol: | 0 g |
| Sodium: | 230 mg |
| Fiber: | 0 g |
| Sugars: | 2 g |
| Sugar Alcohol: | 0 g |
| Calculated per serving. | |








Leave a Reply
You must be logged in to post a comment.