Homemade Cassava Flour Pop Tarts
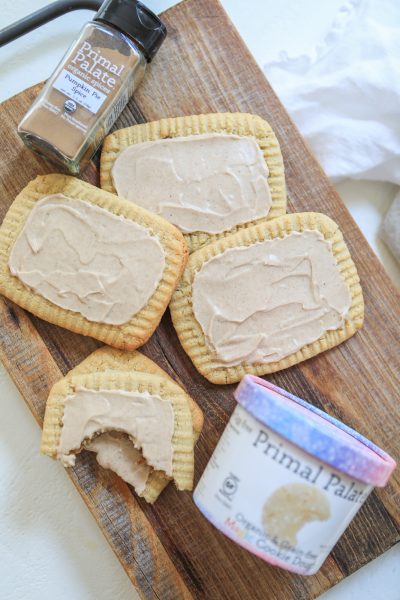
Pop tarts were a rite of passage for most of us, mingled with memories of running out the door to catch the bus and the nostalgic pull of colorful boxes plastered with cartoons. But as adults, those pre-packaged goodies taste underwhelming, overly sweet, and an extra serving of artificial colors and hard-to-pronounce preservatives. Enter: our fresh-from-your oven, golden brown and flaky, 100% grain free version! A tender crust featuring our premium, grain-free Cassava Flour envelopes your favorite filling—go with classic fruit jam or mix it up with chunky preserves, chocolate hazelnut spread, or nut butter studded with chocolate chips. And don’t forget the toppings! A drizzle of icing and a dash of all-natural sprinkles are the perfect way to complete the look of these treats. And yes, you can still bundle them up in pairs to share with your BFF. (RecipeBy @_katelynyoung_)
Ingredients
Pastry Crust
- 1 cup1 cup1 cup Cassava Flour, (Otto's Naturals - Cassava flour)

- 12 oz12 oz12 oz Butter, Unsalted, 1 1/2 sticks, cut into 1/2 inch pieces

- 1/4 cup1/4 cup1/4 cup Ice Water
Filling
- Strawberry Fruit Spread, or other filling (Jam, not Jelly) of choice
Fruit Glaze
- 3/4 cup3/4 cup3/4 cup Powdered Sugar, Grain-Free, or powdered maple sugar
- 1 Tbsp1 Tbsp1 Tbsp Raspberry Juice, or any fruit juice (we just thawed a few frozen raspberries and smooshed them to get some juice out)
- 1/4 tsp1/4 tsp1/4 tsp Vanilla Extract

Buy Ingredients on the FoodSocial Market
Shop over 3500 products from unique and independent, creator-curated brandsProcess
Note, these instructions are written assuming the standard serving size, since you have modified the number of servings, these steps may need to be modified for best results
- In a food processor, combine Otto's Naturals - Cassava Flour, salt, and butter; pulsing briefly until butter is the size of peas, about 10 seconds.
- Add ice water, one tablespoon at a time, until just moistened and crumbly.
- Transfer crumbly dough to a lightly floured work surface and shape into 2 discs. Wrap one in saran wrap and refrigerate while you work with the other.
- Divide dough evenly into 6 balls and flatten each to about 1/8” using the method of your choice. We prefer making rounds using our tortilla press and two pieces of parchment paper, but you can go old school and use a rolling pin if you prefer. Round or rectangle, it’s up to you! If doing rectangle, you’ll want to keep them to about 4” x 3”. Using a ruler helps.
- Stack, separated with parchment, and refrigerate for at least 30 mins. Repeat with the second disc.
- Preheat oven to 350˚F.
- After refrigeration place half the dough pieces on a cookie sheet and fill with whatever you desire, taking care to leave about ¼” on the perimeter for the dough to seal.
- Top with another piece of dough and seal the edges by crimping with a fork, ensuring your filling won’t escape.
- Poke a few tiny holes in the top with something like a toothpick to let steam escape during baking, this will keep the flaky factor high!
- Pop the now ready-to-bake tarts back into the refrigerator while your oven preheats. About 15-20 minutes. This will firm the pastry back up and ensure even baking.
- Bake for about 30 minutes at 350˚F, turning pan once halfway through.
- Allow to cool on pan for about 5 minutes before transferring to a wire rack to cool completely. They will be delicate until completely cool.
- Once cooled to room temperature, drizzle with glaze of choice.
Notes
Store in an airtight container at room temperature for 3 days or in the refrigerator for 6. To reheat pop in the toaster or reheat in a 350-degree oven for 10 minutes. You can freeze if un-frosted and reheat the same way.
Add a Note
My Notes:
About This Recipe
Show nutritional information
Baked Goods Breakfast Coconut Free Desserts Egg Free Gluten Free Grain Free Nightshade Free Nut Free Pescetarian Shellfish Free Sugar Alcohol Free Vegetarian| This is our estimate based on online research. | |
| Calories: | 562 |
| Fat: | 46 g |
| Carbohydrates: | 35 g |
| Protein: | 20 g |
| Cholesterol: | 115 g |
| Sodium: | 6 mg |
| Fiber: | 2 g |
| Sugars: | 16 g |
| Sugar Alcohol: | 0 g |
| Calculated per serving. | |











Leave a Reply
You must be logged in to post a comment.