

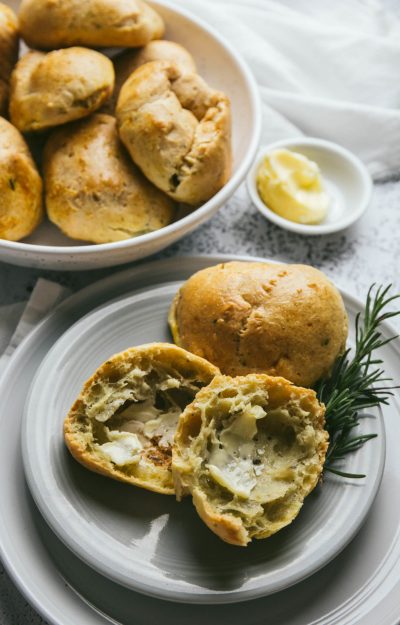
Bread Rolls (Vegan)
PREP TIME
20 minutes
COOK TIME
20 minutes
INGREDIENTS
6
Serves: 8


Ingredients
- 270 grams270 grams270 grams Bread Flour, (2 1/4 cups)

- 6 Tbsp6 Tbsp6 Tbsp Oat Milk, Organic, - 105 F - 115 F (any dairy free milk will work)
- 6 Tbsp6 Tbsp6 Tbsp Water, - 105 F - 115 F
- 4 grams4 grams4 grams Salt, (1/2 tsp)
- 28 grams28 grams28 grams Plant-Based Butter, (2 tbsp) - room temperature
- 5 grams5 grams5 grams Quick Rise Yeast, (1.5 tsp)
Buy Ingredients on the FoodSocial Market
Shop over 3500 products from unique and independent, creator-curated brandsProcess
- In a medium bowl add the flour, salt, yeast, and room temperature butter. Mix well with a spoon. **see notes below if using a stand mixer**
- To the flour mixture add the warmed milk and water (105F to 115F), mix with a spoon until all of the liquid has been absorbed and the dough begins to come together.
- Turn the dough out onto a lightly oiled surface and continue bringing the dough together with your hands. Begin kneading the dough, continue kneading until the dough becomes smooth and stretchy. I knead the dough for no more than 10 minutes.
- Place the dough in a lightly greased bowl and cover or place bowl in a proofing bag and leave in a warm place to double in size. I place mine in the oven with ONLY the oven light on, usually takes 1 1/2 to 2 hours. *See notes below about proofing*
- Once the dough has doubled in size, punch the air out and turn the dough out onto a lightly floured surface. Divide the dough into 8 pieces and roll each into a ball by flattening the dough piece out slightly and then rolling it up, kind of like you would a croissant but tucking in the edges as you go, fold it in half and pinching off the ends.
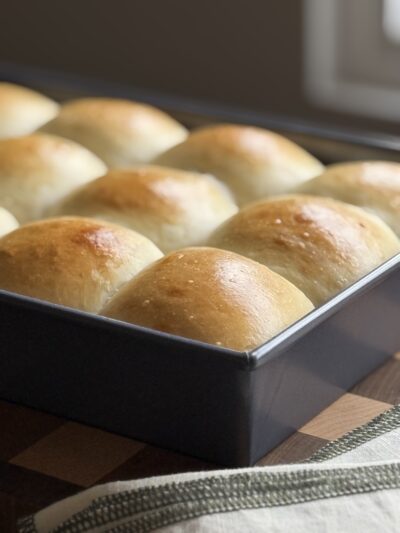
- Place the shaped and rolled dough pieces onto a parchment lined cookie tray. ** see notes for overnight proofing** Cover or place in a proofing bag and leave in a warm place to double in size. I return mine back to the oven with ONLY the oven light on. This takes 45 to 50 minutes.
- Once the rolls have doubled in size, preheat the oven to 430℉ and place the water bath dish in the oven. ** IF you are using your oven to proof, remove the proofing dough before turning the oven on**.
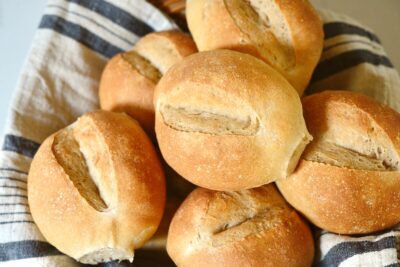
- Once the oven is ready, sprinkle a little flour on each roll, fill the water bath dish about halfway with water, and place the rolls in the oven to bake. Optional: scoring the top of the bread with a bread lame or cutting a small cross shape on top with scissors.
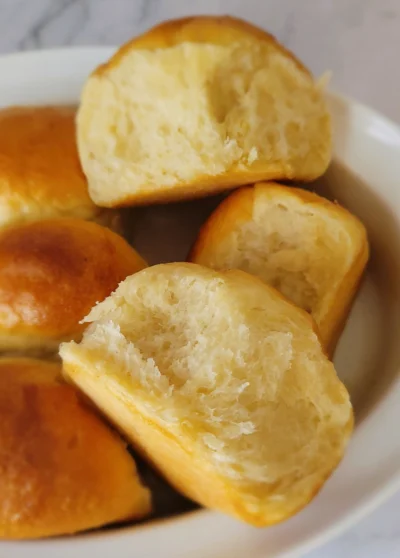
- These rolls will bake for 20 minutes.
- Store in an airtight container or bread bag for up to 5 days in the fridge. They should be fine on the counter for a couple of days.
Notes
***If using a stand mixer, add all ingredients to the bowl of a stand mixer, blend on medium with a dough hook attachment until the ingredients come together to form a ball. Once the ball is formed, continue on medium for another 5 to 8 minutes kneading the dough. It should be becoming smooth and stretchy and pulling away from the bowl. Form your dough into a ball and place in a lightly greased bowl. Cover or place in a proofing bag, leave to double in size. ***When it comes to proofing, I use what I call a “proofing ” bag. I discovered that the large turkey roasting bags that you can get at the grocery store are great for using as a proofing bag. They are usually large enough to put different size bowls in (depending on how much dough I am working with) and medium size baking dishes inside of it. I try to put whatever dish or pan I am baking the item in/on in the bag for the second proof. During the cold months, I find the inside of the oven with the oven light on a great place to proof. ***Remember, if you are using your oven to proof your dough, to take the proofing item out of the oven before setting the baking temperature. ***Want to make these the day before? Follow all the instructions through forming the dough balls and then cover the dish (needs to be airtight) or place the dish back in the proofing bag and place in the refrigerator. The next morning remove the rolls from the refrigerator and leave on the counter (could go in the oven with only the oven light on while still covered or in the proofing bag) and let the rolls reach room temperature and double in size. This process has taken up to 2 hours for me (the warmer the environment the faster this will happen) then follow the rest of the instructions above.
Add a Note
My Notes:
About This Recipe
| This is our estimate based on online research. | |
| Calories: | 169 |
| Fat: | 4 g |
| Carbohydrates: | 27 g |
| Protein: | 5 g |
| Cholesterol: | 6 g |
| Sodium: | 236 mg |
| Fiber: | 1 g |
| Sugars: | 1 g |
| Sugar Alcohol: | 0 g |
| Calculated per serving. | |












Leave a Reply
You must be logged in to post a comment.