Gluten Free Banana Scones
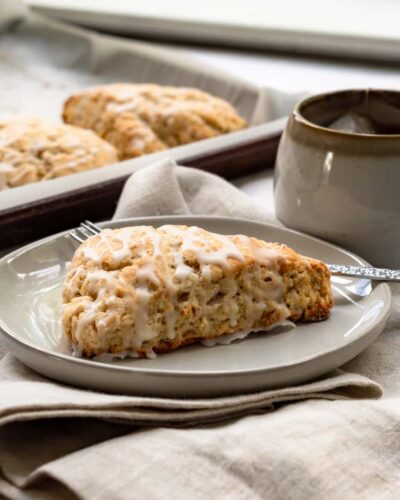
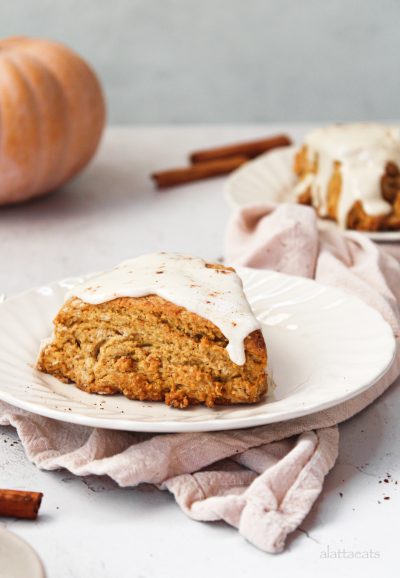
These Gluten Free Banana Scones have a mild banana flavor and a maple glaze! Best is, they're gf, nf, egg free and easily vegan!
Ingredients
For the Scones
- 2 cups2 cups2 cups Gluten-Free Flour

- 2 tsp2 tsp2 tsp Baking Powder

- .25 tsp.25 tsp.25 tsp Baking Soda
- .5 tsp.5 tsp.5 tsp Kosher Salt

- .25 cup.25 cup.25 cup Light Brown Sugar, packed
- 1.5 tsp1.5 tsp1.5 tsp Cinnamon, Ground

- .5 cup.5 cup.5 cup Butter, Unsalted, frozen (1 stick; or vegan baking stick)

- .5 cup.5 cup.5 cup Milk, of choice

- .5 Tbsp.5 Tbsp.5 Tbsp White Vinegar, Distilled
- 222 Banana, medium, mashed
For the Glaze
- 1.5 cups1.5 cups1.5 cups Powdered Sugar, (AKA confectioners' sugar)
- 2 Tbsp2 Tbsp2 Tbsp Pure Maple Syrup, (I used Grade A)

- 2 Tbsp2 Tbsp2 Tbsp Water
Buy Ingredients on the FoodSocial Market
Shop over 3500 products from unique and independent, creator-curated brandsProcess
Note, these instructions are written assuming the standard serving size, since you have modified the number of servings, these steps may need to be modified for best results
- Preheat the oven to 375 degrees Fahrenheit and line a baking sheet with parchment paper.
- Measure out 1/2 cup of milk of choice. Add in the half tablespoon of white vinegar and stir to combine. Put the milk vinegar mixture into the fridge while you make the scones.
- In a large bowl, whisk together the gluten free flour, the baking powder, baking soda, salt, light brown sugar and cinnamon.
- Take your butter or vegan baking stick out of the freezer (if you didn't freeze the butter that's ok but the scones won't be as flaky).
- Using a cheese grater, grate the entire stick of butter or vegan baking stick into the flour mixture. I do this half at a time.
- Mix the grated butter into the flour using clean hands. I kind of rub the flour together in my hands like sand to make sure there are no giant clumps of butter. The pieces of butter should be super tiny. Less than the size of a pea.
- In a small bowl, mash your bananas with a fork. You want them to end up fairly liquidy.
- Once completely mashed and liquidy, pour the bananas into the flour mixture.
- Take the homemade buttermilk (the milk vinegar mixture) out of the fridge and stir again with a spoon. It will be thick and chunky and that's supposed to happen.
- Pour your buttermilk in a circular motion into the flour mixture and mix in with the spatula. It should start to form a dough. If the dough is too sticky to work with, add more flour, one tablespoon at a time.
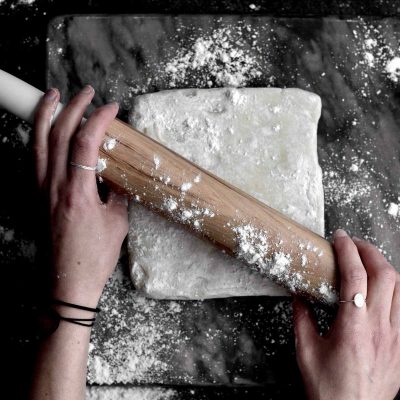
- Take your dough out of the bowl and onto a clean floured work surface. Form the dough into a flat disc that is about 8 inches in diameter. I actually use a tape measure.
- Carefully put a little gluten free flour on a sharp knife and cut the dough like a pizza into 8 equal slices.
- Place the slices on the lined baking sheet at least 2-3 inches apart from one another.
- Bake for 19-22 min or until the tops just start to get golden.
- Take the sheet out and let the scones cool on a cooling rack.
- Place wax or parchment paper underneath your cooling rack. (The parchment paper under the rack is just to prevent a giant mess on your counter because the glaze can drip as it hardens).
- While they're cooling, make the glaze. Whisk all the glaze ingredients together in a medium bowl. If the glaze is too thick, add more water, 1/4 teaspoon at a time. If the glaze is too thin, add more confectioners' sugar, 1 tablespoon at a time.
- Drizzle the glaze over the completely cooled scones.
- Cut the scones open and serve them with butter or vegan baking sticks or just eat them as they are! They are best consumed the first day. Enjoy!
Notes
Since gluten free baked goods are best the first day, we want to try to keep this as fresh as possible. Once the scones have cooled and the glaze has hardened, store them in an airtight container at room temperature. When ready to eat, I would warm them up for a few seconds in the microwave. // Wrap the cooled scones in foil and then place in a zip top bag. Freeze. You can keep the scones frozen for up to 30 days. When ready to eat, put the scones in the fridge the night before or leave them out on the counter for 2 hours prior to eating. Heat them up for a few seconds in the microwave until they are warm.
Add a Note
My Notes:
About This Recipe
Show nutritional information
Breakfast Coconut Free Desserts Egg Free Gluten Free Nut Free Pescetarian Shellfish Free Sugar Alcohol Free Vegetarian| This is our estimate based on online research. | |
| Calories: | 346 |
| Fat: | 12 g |
| Carbohydrates: | 57 g |
| Protein: | 6 g |
| Cholesterol: | 32 g |
| Sodium: | 134 mg |
| Fiber: | 2 g |
| Sugars: | 32 g |
| Sugar Alcohol: | 0 g |
| Calculated per serving. | |












Leave a Reply
You must be logged in to post a comment.