Mini Chocolate Peppermint Tarts
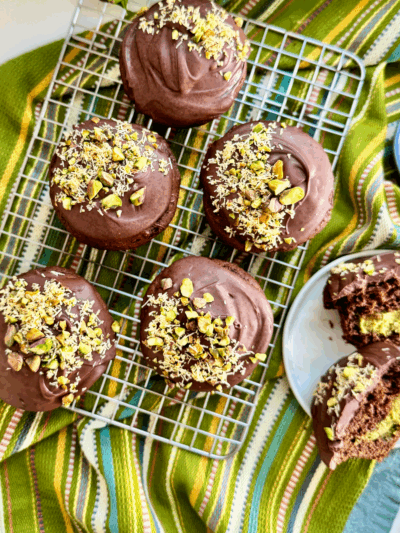
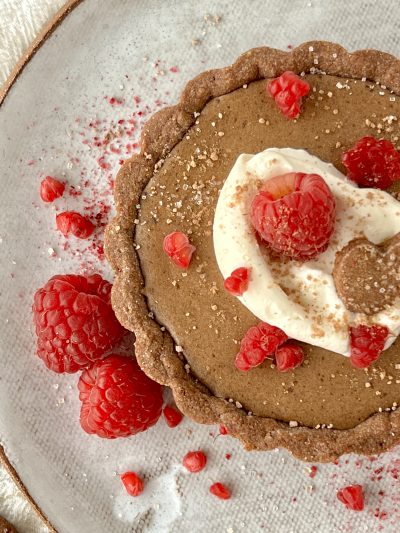
A chocolate pastry filled with a luscious mint infused pastry cream! Plus the combo of pie and chocolate is so tasty! A very festive little dessert with elements you can prep ahead of time, which is so great this time of year. You can leave the peppermint oil out of the cream and then you’d have a standard pastry cream which is super tasty as well.
Ingredients
chocolate pastry
- .75 cup.75 cup.75 cup Cassava Flour

- 2 Tbsp2 Tbsp2 Tbsp Cocoa Powder

- .33 cup.33 cup.33 cup Maple Sugar

- .25 tsp.25 tsp.25 tsp Sea Salt

- .5 cup.5 cup.5 cup Palm Oil Shortening

- 1 whole1 whole1 whole Egg, room temperature, whisked
- 2 Tbsp2 Tbsp2 Tbsp Almond Milk, or milk of choice

- 1 whole1 whole1 whole Egg, +1 tbsp water for optional egg wash
Peppermint Cream
- .25 cup.25 cup.25 cup Maple Sugar

- .25 tsp.25 tsp.25 tsp Kosher Salt

- 1.50 Tbsp1.50 Tbsp1.50 Tbsp Tapioca Starch

- .75 cup.75 cup.75 cup Almond Milk, or milk of choice

- 1.50 Tbsp1.50 Tbsp1.50 Tbsp Butter, Salted, can sub ghee

- .5 tsp.5 tsp.5 tsp Pure Vanilla Extract

- 6 pinch6 pinch6 pinch Peppermint Essential Oil, 6-8 drops depending on preference, can sub mint extract

- .5 cup.5 cup.5 cup Whipped Cream, sweetened, brand of choice (dairy free or other)
Buy Ingredients on the FoodSocial Market
Shop over 3500 products from unique and independent, creator-curated brandsProcess
Note, these instructions are written assuming the standard serving size, since you have modified the number of servings, these steps may need to be modified for best results
- Preheat the oven to 385°.
- In a medium bowl combine cassava flour, cocoa powder, powdered maple sugar and salt, whisk to combine.
- Drop shortening into dry ingredients and blend with a pastry cutter until all shortening is incorporated, even and resembles coarse crumbs.
- Pour the whisked egg into the shortening/flour mixture and work together with a wooden spoon until it again resembles a coarse crumb mixture. Or if you need to, use your fingertips, sometimes this is just easier.
- Add milk and work this into the crumb mixture until it’s the right consistency and isn’t too sticky. You should be able to touch it and not have dough stick to your fingers so you can form it into a ball. You can also dust your fingers with a little more cassava flour to get it rolled into a ball.
- Divide dough in half, leaving one half in the bowl (covered with plastic). Roll out the other half between two pieces of parchment paper, dusted with cassava flour. You’ll want it between ⅛-¼” thick. Using a round cutter that is just slightly larger than your tart pan, cut out and place a circle in the tart pan and shape according to manufacturer directions. Reroll scraps and cut out additional tart shapes. Do the same with the other half of the dough until all tart pans are filled.
- Using the tines of a fork, prick the bottom of each tart pan and bake until set. For a 2½” tart pan, it was around 12-15 minutes. This will vary depending on the size of your tart pan. Brush with whisked egg half way through bake time if using.
- Once baked, remove from the oven and let cool completely before removing from the tart pan.
- Prepare peppermint cream. Set a fine mesh strainer over a 4 cup glass bowl, set aside.
- In a medium bowl add egg yolks, maple sugar, kosher salt & tapioca starch. Whisk until well combined and set aside.
- In a 3 qt stock pot, warm milk just until you see bubbles around the edges. Remove from heat and temper the egg mixture by pouring slowly in a small stream into the egg yolk mixture, whisking constantly until all milk is mixed in. Return all of this back to the stock pot and heat until thickened. Stirring constantly. Pour this mixture through the fine mesh strainer, pushing mixture through with the back of a spoon into the bowl.
- Once strained, stir in butter, vanilla and peppermint oil, whisking until fully incorporated. Place in the fridge to cool.
- After the mixture is cooled, add whipped cream, whisking until smooth. Fill tarts and store any leftover cream in the refrigerator until ready to use.
Notes
I used some mini diamond shaped tart pans my mother in law gave me years ago. They are super vintage and it was a treat to let them guide me in my tart making adventure. I also had a mini tart pan for some of the more traditional shaped tarts pictured. Whether you make traditional sized tarts or mini tarts, the recipe will work either way, you’d just get fewer tarts than the 12 I got.
Add a Note
My Notes:
About This Recipe
Show nutritional information
Baked Goods Coconut Free Desserts Gluten Free Grain Free Nightshade Free Pescetarian Pies Shellfish Free Sugar Alcohol Free Vegetarian| This is our estimate based on online research. | |
| Calories: | 157 |
| Fat: | 10 g |
| Carbohydrates: | 16 g |
| Protein: | 1 g |
| Cholesterol: | 5 g |
| Sodium: | 95 mg |
| Fiber: | 2 g |
| Sugars: | 7 g |
| Sugar Alcohol: | 0 g |
| Calculated per serving. | |






Leave a Reply
You must be logged in to post a comment.