Gluten-Free Apple Pie
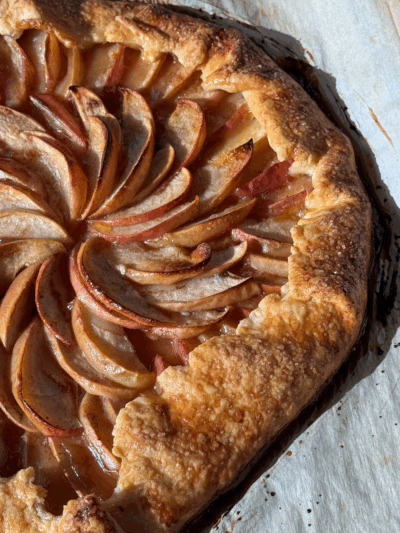
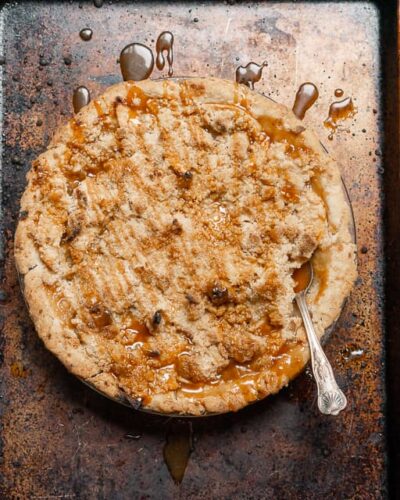
The only apple pie recipe you will ever need! This perfect gluten-free apple pie has the most flaky pie crust that nobody will ever know is gluten-free. The filling is perfect, with no overly runny apple filling. This recipe will be your go-to for any time you want apple pie!
Ingredients
- 3 lb3 lb3 lb Apples, Honeycrisp, peeled, cored, and thinly sliced
- 8 Tbsp8 Tbsp8 Tbsp Butter, Unsalted

- 1/2 cup1/2 cup1/2 cup Light Brown Sugar
- 1/4 cup1/4 cup1/4 cup Granulated White Sugar

- 2 tsp2 tsp2 tsp Apple Pie Spice

- 2 Tbsp2 Tbsp2 Tbsp Gluten-Free All-Purpose Flour - Primal Palate, 1 tablespoon for sauce, 1 for the apples

- 300 grams300 grams300 grams Gluten-Free All-Purpose Flour - Primal Palate, 2 1/2 cups spooned and leveled

- 1 Tbsp1 Tbsp1 Tbsp Milk Powder, Non-Fat
- 2 Tbsp2 Tbsp2 Tbsp Granulated White Sugar

- 1/2 tsp1/2 tsp1/2 tsp Xanthan Gum
- 1/2 tsp1/2 tsp1/2 tsp Himalayan Pink Salt, fine salt

- 8 oz8 oz8 oz Butter, Unsalted, European style, cold, cut into thin slices

- 1/2 cup1/2 cup1/2 cup Water, cold water
- 1.5 Tbsp1.5 Tbsp1.5 Tbsp Apple Cider Vinegar
- 1 whole1 whole1 whole Egg, whisked
- 1 Tbsp1 Tbsp1 Tbsp Water
- 3 Tbsp3 Tbsp3 Tbsp Granulated White Sugar

Easy Gluten-Free Pie Crust
Egg wash
Buy Ingredients on the FoodSocial Market
Shop over 3500 products from unique and independent, creator-curated brandsProcess
Note, these instructions are written assuming the standard serving size, since you have modified the number of servings, these steps may need to be modified for best results
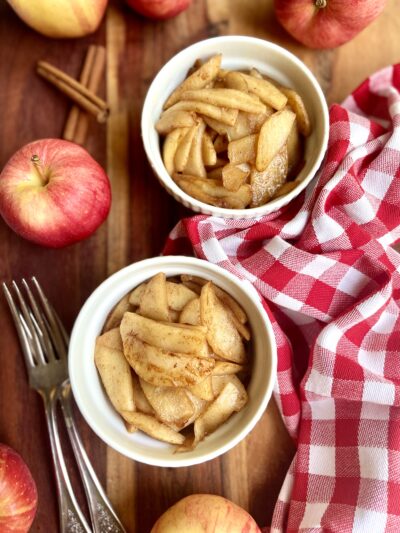
- Peel, core, and slice the apple. Place the apple slices in a large mixing bowl.
- In a large pot with a lid, heat the 8 tablespoons of butter over medium heat until melted.
- Whisk in the brown sugar and white sugar, and then the apple pie spice. Cook the sugar while whisking for a couple minutes turning the heat down to low if it seems like the sugar is cooking too quickly.
- Stir in the apple slices, and make sure they are coated with the sugar, spice, and butter mixture as evenly as possible.
- Keep the heat on low, cover the pot with the lid, and allow the apples to cook for 10 minutes, stirring half way through.
- Place a large strainer into the bowl that contained the apple slices, and pour the apples and the juices into the strainer so all of the liquid can drain into the bowl. Let the apples sit in the strainer to drain and cool while you prepare the pie crust.
- In another large mixing bowl, whisk together the 300 grams of flour, milk powder, sugar, xanthan gum, and salt.
- Cut the cold butter into small thin slices, and toss the butter with the flour. Break up some of the butter with your fingers so you have tiny bits of butter combined with the flour, and then also the bigger pieces of butter coated in the flour.
- Cover the pie dough at this point, and place in the freezer for 20 minutes so the butter stays very cold.
- After 20 minutes, remove the dough from the freezer, and start adding the water and apple cider vinegar. You can mix the apple cider vinegar into the water, and then start adding 2 tablespoons at a time, and mixing the water into the flour.
- Once you have brought the dough together by mixing in the cold water, divide the dough in half, and place each half on a sheet of plastic wrap, and flatten into a round disk.
- Cover the disks of dough with the plastic wrap, and place in the fridge for 30 minutes.
- At this point you can finish the apple pie filling. Pour all of the liquid that drained from the apples back into the pot, and turn the heat to medium.
- Whisk in 1 tablespoon of the gluten free flour, and continue to whisk while the sauce thickens. This will be about 3 minutes.
- Stir and cook the sauce for approximately 5-7 minutes, then remove from the heat.
- Toss the apples with the other tablespoon of flour, and once the sauce has cooled, pour it over the apples, and toss to combine.
- Flour your work surface with gluten-free flour, and place on of the disks of pie dough onto the work surface.
- Roll our your pie dough until it is about 1/8 inch thick, and 1 inch wider than your pie plate. flour your pie dough and the surface as needed so it doesn't stick, and move the dough around as you roll it to keep it from sticking to the surface.
- Roll the pie dough around your rolling pin, and drape it over your pie plate, gently lifting it and laying it down again so that it fits the plate properly. You can trim any excess that is hanging too far over the pie plate, and then tuck the edges in, cover with plastic wrap, and place in the freezer for 15 minutes.
- Preheat your oven to bake at 400 degrees F.
- Remove the other disk of pie dough from the fridge, and roll out to a similar size as the first one, but try to form it into more of a rectangle shape to cut strips for a lattice.
- Cut 8 strips of pie dough for the lattice. I like having mine be about 1.5 inches wide.
- Remove the pie from the freezer, and pour the filling into the pie.
- Cover with the lattice top, trim any excess strips of dough that are hanging down the pie pan, and tuck the edges under to form the crust.
- Cover the pie, and place in the freezer for another 15 minutes.
- Remove the pie from the freezer. Whisk together the egg and water, and brush the egg wash over the pie crust. Sprinkle the pie crust with granulated white sugar.
- Place the pie on a lined baking sheet to catch any butter that may drip.
- Place the pie in the center of the oven, on the middle rack, and bake at 400 for 25 minutes.
- After 25 minutes, turn the heat down to 375, and bake for a remaining 35 minutes.
- Remove the pie from the oven, and allow to cool completely before cutting.
Add a Note
My Notes:
About This Recipe
Show nutritional information
Coconut Free Gluten Free Nut Free Pescetarian Pies Shellfish Free Sugar Alcohol Free| This is our estimate based on online research. | |
| Calories: | 465 |
| Fat: | 28 g |
| Carbohydrates: | 52 g |
| Protein: | 12 g |
| Cholesterol: | 70 g |
| Sodium: | 103 mg |
| Fiber: | 3 g |
| Sugars: | 33 g |
| Sugar Alcohol: | 0 g |
| Calculated per serving. | |














Leave a Reply
You must be logged in to post a comment.